It is time to transition Kizzy from her bassinet to a crib though. Actually past time since the weight guidlines for a bassinet is up to 15 lbs. and Kizzy is now 17lbs. Oops! Since we bought an older used crib at a yard sale, I wanted to at least paint it before she started using it. We got it for only $15 and it was a bit worn, but it is functional.
 We did buy a brand new mattress for it. :) As you can see in the picture, I taped off all the areas that were plastic, the side pieces where you hook it all together and the plastic on the top of the sides.
I debated for a while on how to paint the crib. Doing a quick search of how to paint a crib basically went with both spray paint and regular paint. So, I guess it would just be a preference. I chose to spray paint cause I figured it would be easier with all the bars and such. After all is said and done, I think the best way to paint a crib would be to use a spray gun and regular paint. This would give you the best coverage.
Then I debated (with just myself of course) what color to paint the crib. After browsing Pinterest, I found this picture of a red crib and loved it.
 (Found here.) But then I wondered if that would be too bold. So, I almost convinced myself to go with a white or cream paint. Then I saw this one and was sold on the red.
  Red will be perfect for the sock monkey theme that I plan to go with.
Painting the crib took longer and more paint than I expected. It took a whole 5 cans of spray paint to get it all covered. Trust me, it isn't a perfect paint job either, but it will work. So, here is the end result.
 (Ignore the less than great picture.) For now the crib is in our room, as we haven't transitioned Kizzy to her own room yet. Thanks to my brother, Dale, for helping my assemble the crib. It was more difficult than I anticipated.
One last note. Since this is an older crib, it has a drop down side. That is a big no-no these days since it is a safety issue. Sometimes you can get parts from the manufacture to fix it. If not, there is an easy way to fix the crib so that it is safe to use. All you need are two corner brackets and some screws (about $5 at most hardware stores.)
 Just put the bracket at the bottom of the side rail, with the railing in the highest position, and screw it to the bottom of the rail and the side leg of the crib. Do this on both sides and the rail won't move at all.
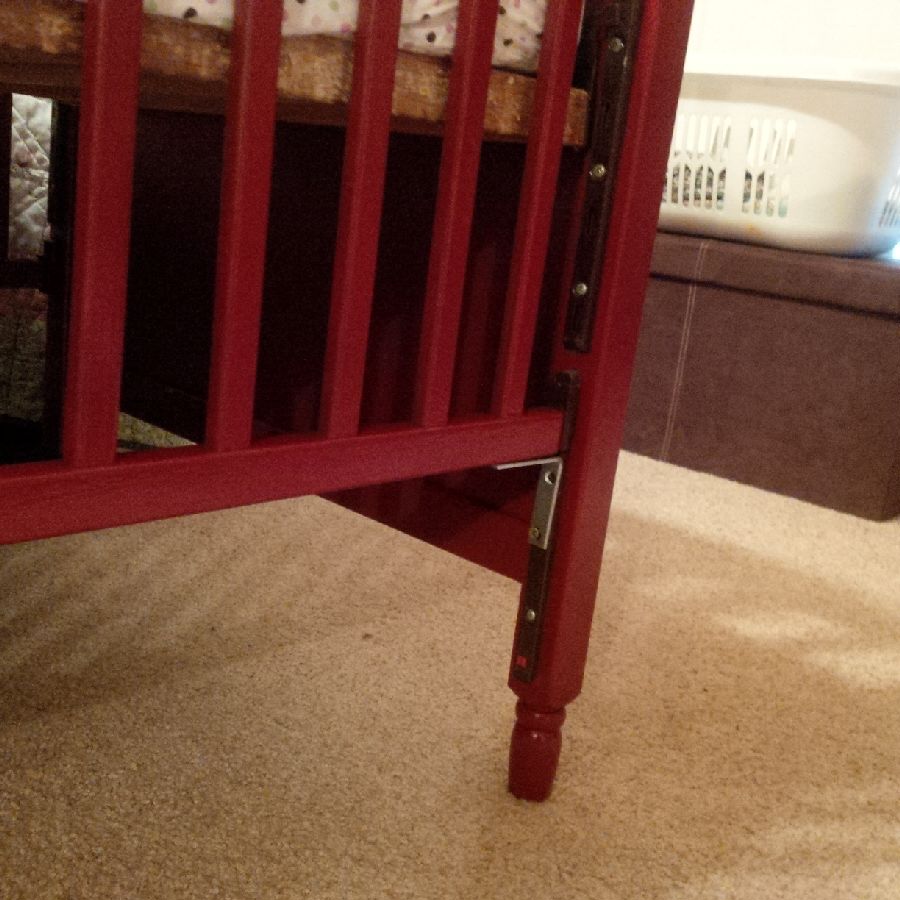 Problem fixed and crib safe! The only down side to this is that you can't take off that one side of the crib without taking off the brackets.
Again, here is the crib before and after.


