Showing posts with label diy. Show all posts

Tuesday, August 2, 2016

Baby Room - Crib

So, scraping wallpaper and painting a baby room while taking care of a baby is just not happening. Ugh! Maybe it will get done by the time Kizzy is one, or at least I hope. Poor child may just have to live in a room with partially scraped wallpaper.

It is time to transition Kizzy from her bassinet to a crib though. Actually past time since the weight guidlines for a bassinet is up to 15 lbs. and Kizzy is now 17lbs. Oops! Since we bought an older used crib at a yard sale, I wanted to at least paint it before she started using it. We got it for only $15 and it was a bit worn, but it is functional.We did buy a brand new mattress for it. :) As you can see in the picture, I taped off all the areas that were plastic, the side pieces where you hook it all together and the plastic on the top of the sides.

I debated for a while on how to paint the crib. Doing a quick search of how to paint a crib basically went with both spray paint and regular paint. So, I guess it would just be a preference. I chose to spray paint cause I figured it would be easier with all the bars and such. After all is said and done, I think the best way to paint a crib would be to use a spray gun and regular paint. This would give you the best coverage.

Then I debated (with just myself of course) what color to paint the crib. After browsing Pinterest, I found this picture of a red crib and loved it. I LOVE colored cribs. A round-up of painted cribs in every color of the rainbow! @BabyCenter #nursery #crib:  (Found here.) But then I wondered if that would be too bold. So, I almost convinced myself to go with a white or cream paint. Then I saw this one and was sold on the red. Sock Monkey Nursery @ashley Litwin if only we surprised Chris with this before Cal was born!:  Red will be perfect for the sock monkey theme that I plan to go with.

Painting the crib took longer and more paint than I expected. It took a whole 5 cans of spray paint to get it all covered. Trust me, it isn't a perfect paint job either, but it will work. So, here is the end result. (Ignore the less than great picture.) For now the crib is in our room, as we haven't transitioned Kizzy to her own room yet. Thanks to my brother, Dale, for helping my assemble the crib. It was more difficult than I anticipated.

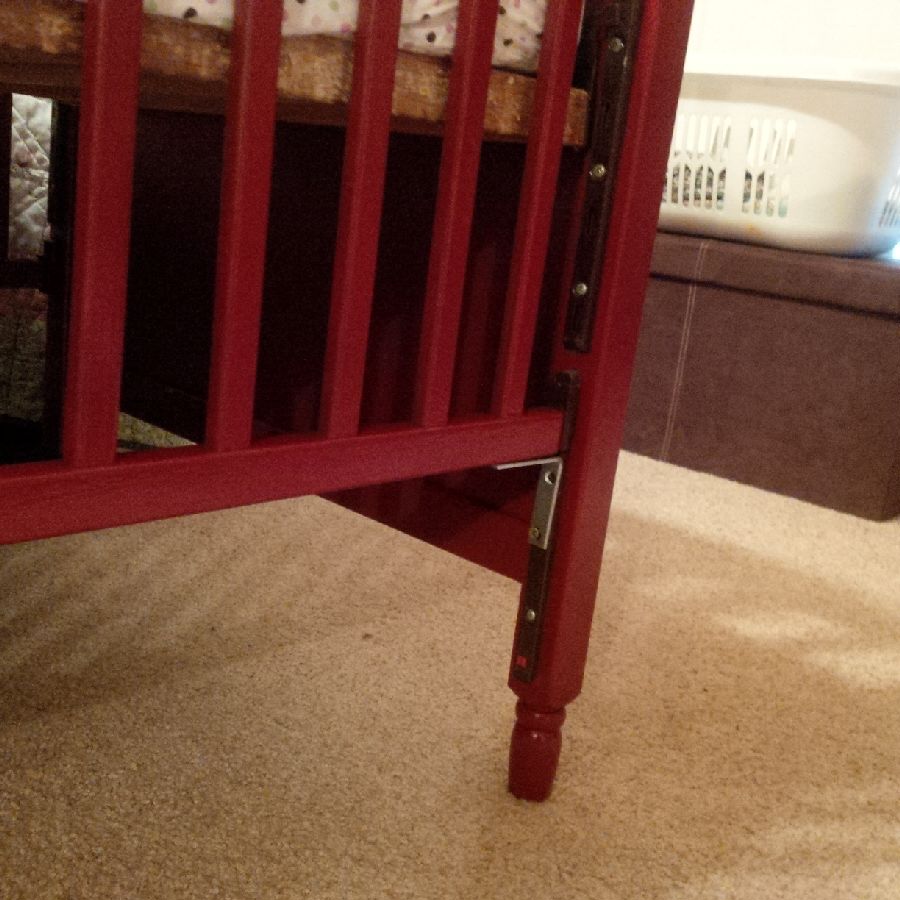
One last note. Since this is an older crib, it has a drop down side. That is a big no-no these days since it is a safety issue. Sometimes you can get parts from the manufacture to fix it. If not, there is an easy way to fix the crib so that it is safe to use. All you need are two corner brackets and some screws (about $5 at most hardware stores.) Just put the bracket at the bottom of the side rail, with the railing in the highest position, and screw it to the bottom of the rail and the side leg of the crib. Do this on both sides and the rail won't move at all.Problem fixed and crib safe! The only down side to this is that you can't take off that one side of the crib without taking off the brackets.
Again, here is the crib before and after.


Thursday, December 31, 2015

Baby Room Redo - Step #1

With less that two months until Baby Geurs arrives, it is time to get going on the Baby's room. I have had plans for the room since finding out the gender. Having the time, motivation, and energy to work on the room has been the issue. So, now I begin.

First off, the room still had several boxes of random stuff that we just put in there when we moved into the house cause we didn't know what to do with them. And there they stayed for two plus years. We have also accumulated other random item in the room along the way. To begin the process we had to move all that stuff out of the room. That meant sorting, throwing away stuff, donating stuff, and moving stuff to the attic, basement, or other rooms. Not a fun process. We got it done though. Here are some before photos that I snapped quickly to show how the room started out. Note that at this point a lot of the extra stuff had been removed and some baby stuff had been moved in.


Not real exciting photos, but you can see that there is some work to be done. I have started removing the wallpaper. Not an exciting job, but it has to be done if the room is going to be painted. The old wallpaper (like much of the rest of the house) was in terrible condition and was ripped and coming off in several spots. Not to mention there are three layers of wallpaper and three borders on the wall. I have not idea what these people were thinking when they just kept layering it on. 

Stay tuned for updates as the work progresses. Step two is to remove all the wallpaper and paint the room and ceiling. 

Friday, October 30, 2015

From Trash Burner to Fire Pit

Last weekend the weather was nice; and Gerrit and myself both had the weekend off. That doesn't happen very often. We made plans to tackle some outside work over the weekend and I am sure glad we did. A little rain got in our way and slowed us down, so we didn't accomplish as much as we wanted. We did get the gutters cleaned out, oh yeah that is never a fun job. We also demolished the old brick trash burner that was in the middle of our yard and  replaced it with a fire pit. That was a more fun project cause we have been wanting to do that since about last summer.

Here is what the old brick trash burner looked like. (Old picture from when we first bought our house.)

The trash burner was still usable, but some of the bricks were starting to come loose or cave in. And honestly we didn't use it very often. Maybe a few times in the spring or fall to burn sticks and leaves. We don't burn our trash, so we didn't need it for that. 

Gerrit was given a sledge hammer by one of our friends. I guess those are the kinds of gifts men exchange. So, before I was even ready and outside to work, he had to whole things down. It came apart pretty easily and quickly. 

Next we had to pick up all that brick. This was the part that took the longest. We loaded it all in the back of the truck, then unloaded it around some pine trees on the side of the yard so it is out of the way. 

When it was all cleaned up, we were left with a square cement slab that was the foundation of the trash burner. We left that in place and decided it would be easiest to put a pre-made fire pit on top of it. We did discover that under the cement slab there is actually a large hole that has cement sides. This is such a mystery as to what that was there for. We did check it for bodies though, all clear. We had some cement landscaping pavers that we were not using. We actually picked those up for free from someone's house on a Sunday after church. It took me a few minutes and a few tries of how to lay them out, but I figured out something that would work and give a nice edge around the cement. The extra space on the one side of where the fire pit isn't can be used to stack the wood that is waiting to be burned. 

Then we were off to Rural King to get some rock to fill in the empty part and get a fire pit. And then the rain came, and the work stopped until the next day. The next day I used three bags of black lava rock to fill in the space. Some of the cement slab was uneven, so I wedged some rock pieces under the pavers to keep them steady. We assembled the fire pit. Then we were done. 

The spot looks so much better and more up to date without the trash burner.

We were proud of our work. Not to mention the payoff looked something like this. 


Saturday, September 12, 2015

Autumn Wreaths

The weather is cooling down and I am waiting for the leaves to start changing. Ready for fall to arrive. Yesterday I put up the fall wreaths. It is September, so it isn't too early for that, right? One wreath I already had and the other was a quick make.


Here is the one that I made last night. It was super easy, quick, and cheap. Those three things go together quite well if you ask me. It only cost me a grand total of $4.00 + tax. All supplies from the Dollar Store. Here is the list of what I used:

  • Round foam wreath form, now this is a bit small, I think it was 9", so if you want something bigger you will need to use something else.
  • One spool of burlap ribbon, one spool was 3 yrds., and it exactly covered the whole wreath form. If you want a bow or more ribbon, you will need two spools.
  • Two bunches of fall flowers, I cut them apart and rearranged them to give them a fuller look. 
  • Small piece of leftover ribbon that I already had to make a loop to hang the wreath with. 
  • Glue gun to attach the flower and secure the ends of the ribbon. 

There you have it. Wreaths are way overpriced in the store and you can make your own for much cheaper. The decoration that I put on the other door was something that I had made a few years ago, for FREE. I made it when I wanted something autumn decor-ish to put up, but didn't have extra money to buy stuff to make anything.


Here is what I used and how I made it.

  • Small sticks that I picked up from the yard. just broke them to make them the right size. Bundled four together and secured them with floral wire. Then glued the bundles together at the corners, like a picture frame.
  • Piece of a paper bag. Cut it into the size of square that I needed to fit inside the stick frame. Hand wrote our last name on it and then filled it in with a black sharpie. Glued the paper onto the back side of the sticks.
  • Leftover fake fall leaves and a piece of ribbon. Hot glued the leaves to the sticks and the ribbon to the back of the sticks. 
Using leftover materials, it was all FREE!

Happy Fall Crafting!


Saturday, June 6, 2015

Old Crate Turned Flower Box / Hose Holder


I am not sure where May went, but time is flying by. Several weeks ago I did manage to plant all my flowers and the garden. Last year I made my Flower Towers. The 3 Pot one is in use again this year, but the Topsy Turvy one had to be disassembled, as the support pole didn't make it through the winter :( . Still using the pots. They are just sitting on the sides of the steps to the front door. This year I was inspired to come up with another new planter too.

This one was super simple and I used stuff that I already had. The only items that I had to purchase were the potting soil and flowers. Here is my Old Crate Flower Box / Hose Holder.


We had this old crate in our garage, it came with the house, and it wasn't being used for anything. It has a lid with broken hinges, so I just left it on there and leave it open, but I could close the top when summer is over.

Now, I didn't want to fill the entire thing with potting soil. First of all, it would be super heavy and I wouldn't be able to move it on my own if needed. Second, I didn't want to use that much potting soil. And lastly, I didn't think I had enough flowers left to fill the entire thing. So, I found an empty plastic container. Actually it is an old kitty litter box that someone gave us. I put the tray that a flat of flowers comes in underneath it so that it would sit up higher. With the empty space leftover, I coiled up the hose and put it in there to keep that out of the way. Really simple and easy. 


Monday, April 20, 2015

Side Entrance / Mudroom / Porch Redo

Getting a room redone seems to take me months, or years. At the rate that I am going our house will be completely redone about the same time we pay off our mortgage. The first room that I managed to finish was the bathroom. Now I have worked on other rooms and other stuff in the mean time. Such as the dining room, it may be my thorn in my side. I will greatly rejoice when that room is finished. Back to the porch / side entrance / mudroom, because it is actually finished. :) Now, I'm not completely sure what to call this room. You see it is an enclosed porch, which happens to also be the entrance that we mainly use, and we use it as a mudroom. We usually refer to it as the porch though, so that it what I will call it here.

Here are the before shots.


 As you can see, the porch was a catch-all for lots of stuff. I showed Gerrit these pictures and his response was, "Is that really what it looked like?" Uh, yeah.

The porch was a pretty easy makeover really. It took me a total of two or three days to get it done. Those days just happened to be seven months apart. I did the bulk of the work on this room way back at the end of September. It all started with a little inspiration. I had a larger antique American flag that I wanted to hang somewhere and leftover yellow paint from painting the bathroom. Thus my inspiration picture. 
entry hallway from before civil war in whole house remodel farmhouse addition
I found this picture on This Old House. I used my flag, which happens to be an antique 48 star flag (sorry Alaska and Hawaii, no offense to you) that I purchased at an auction for $20. I actually got it for Gerrit a while back, but we hadn't done anything with it yet. It now covers that top of the window which connects to the bathroom.  
Next, came painting. Removed the wallpaper border and added a couple layers of paint to the wall under the windows. Left the old siding walls as they were. Just cleaned them up a little. I actually like the old siding just the way it is. 

Then I added some little touches to the room:

  1. A simple string of lights about the ceiling on one side. This adds a little extra light when needed. The porch area only has one other light for the whole area. Originally I had a more elaborate plan to make some hanging lights, but Gerrit suggested just using Christmas lights that we already had. Sometimes simpler is better. 
  2. Put a wooden drying rack against the wall for any wet clothes. 
  3. Added a metal tub ($5 at a second hand store) for shoe storage and a tray with rocks for wet shoes. Need to add more shoe storage though, cause this doesn't contain them all.  
  4. Spray painted the base of the wall light. From shiny silver to oil rubbed bronze. 
  5. Put up new coat hooks, a decorative hook for leashes, and a basket to hold miscellaneous items. This may be my favorite part of the the room. I also found this second hand for like $1 and spray painted it red. This basket is actually for Gerrit to put keys, wallet, and such in. Just trying to avoid playing the where is my ................. (fill in the blank) game. He says that I can't change his ways though. Let me also add that the owl hook is actually made from re-purposed materials found after Hurricane Katrina. Gerrit bought it while he was in New Orleans last year. 
  6. Hung a welcome sign that I made and some patriotic plates. 

  7. Hung our "Animal Rescue" sign. Let me note that we don't actually have an animal rescue in our house, it just feels that way sometimes with two cats and two dogs that are all rescue animals. Actually, my brother made this for us as a Christmas gift. I don't dare hang it outside, we could end up with more pets. 
  8. I also changed out the knobs on the cabinets and added a few decorative pieces to the window ledge. Side note, this window is one of the things that I loved about the house when we first looked at it. I like those old details. 
  9. And lastly was the bench. I actually finished everything else on the porch in two days. Then several months later I finished the bench, which was the finishing touch. This was actually a side table thing that I got at an auction for $5! I painted it with the same yellow as the walls. Spray painted the hardware and bottom of it with an oil rubbed bronze. Added some legs that I made from scraps of wood that I spray painted the same oil rubbed bronze. Made a simple cushion for it, and that was it. It is cat approved! They actually think it is a new bed for them. I've already cleaned a good deal of hair off of it, and that is why I made it so that it could be removed and washed. 

And there it is, the made-over porch. A little cleaning, paint, and decorative touches make a big difference.

Thursday, September 4, 2014

Front Door Paint Job

Summer has flown by and with it went all the time and plans that I had for summer projects. Finally, I managed to at least get the front door repainted. The door was in good shape, but I wasn't fond of the color. Just wanted something more fun and  wanted it to match the blue accent color I picked for the house. So, I went from this......  

to this......

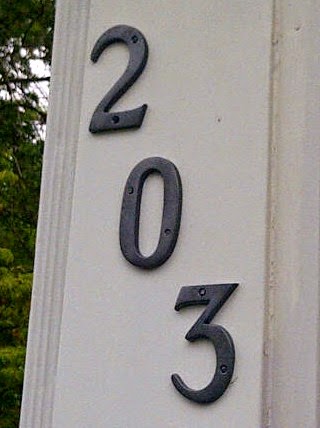
 Now the door matches the flower pot tower. The paint color is from Walmart and it is called Deep Heliotrope. It looks like it is a bright royal blue when the sunlight is on it, but when it is in the shade it is more of a darker true blue. Sometimes it even looks a little purple. Much more fun than the dark green door. Along with the paint job for the door, I freshened up the house number and the porch light with a coat of spray-paint.
Really simple and quick project that just makes everything look a little more put together. Also, If you don't have money to change out what you have for what you want, this is a great way to make it work. Here are the simple steps that I took:

  1. Remove whatever you can and lay it out on newspaper, cardboard, or something that you can spray paint on. I was able to take the house numbers off and the top part of the light fixture. 
  2. Clean off the dirt and cobwebs. 
  3. Tape off anything that you don't want painted. In my case, I taped off around the light fixture and then taped sheets of newspaper around it so that I wouldn't spray paint  the windows or siding. 
  4. Give everything a coat or  two of spray paint. I used Krylon Fussion in a dark grey metal hammered finish. 
  5. Let it dry completely and then put everything back together. 
This small project was pretty quick and I was able to do it while letting coats of paint dry on the door. Speaking of the door, here is how that was done. 
  1. Clean the door. 
  2. Fill any dents or cracks. I used an outdoor caulking to seal around the frame of the window because there were some cracks in it. 
  3. Tape off everything that you don't want painted. The proper way to paint a door would be to remove it and all the hardware. I am too lazy for all that. So, I just taped off what I didn't want painted. 
  4. You may want to lightly sand the door so that the paint adheres to it really well. (I didn't do this, we will see if that was a smart step to skip or not.)
  5. Apply a layer of outdoor paint primer and let it dry completely.
  6. Apply a coat or two of an outdoor paint. I used a flat finish paint cause that I what I had on hand, but a semi gloss finish is really nice and easier to clean. 
    When painting a door it is important to paint it correctly to avoid streaks or drips. Here is a graphic that I saw on Pinterest that was super helpful.
There you have it, a new fun blue door. So, simple that I even made dinner in between coats of paint. And there I am in the reflection of the storm door.